Pectel SQ6M: Tuning Documentation


SQ6M: Tuning Strategy... Document
Things First
The Cosworth
Pectel
SQ6M is communicated with and tuned with the PC CalTool 3.6 interface
via
an Ethernet cable. You on one end of cable and the SQ6M sitting
there waiting for your thousands of keystokes, all
intertwined in your strategy for utter domination. In that
there
are 8800 items in the various CalTool 3.6 drop down menus, your memory
and attention span can get a
bit taxed, stimulants or no stimulants and, if you are over 28 years
old, your mental capacity is shrinking day by day.
For a complete listing of the programmable parameters in CalTool 3.6 we
have prepared a 219 page PDF
listing these.
It can be a bit taxing to remember where things are located in
the various categories of drop-down menus, and selecting an item in
parameters will jump to that particular section.
It's a good idea to keep a permanent documentation record of where the data is located in the software and what the data is. Unless you are a Cosworth Engineer and work with the software all the time, you won't remember where things are located, much less what you have previously entered, so keeping separate documents provides both a shortcut to and a record of your CalTool 3.6 entries.
Once we had an
negative Ignition Adder show up on our SQ6M simulator and we could
not locate it even after looking for several days off and on. We
finally contacted
Cosworth U.K. and a Pectel Engineer suggested we set up a trace for Trq_limit_src and
it would point us to where the fixed retard was coming from. Turns out
it was an artifact from an older "Dyno Only" SQ6M file and was buried
in a
gear change category. We found and zeroed out this negative adder. When
we first noticed this our simulator
did not
have a shift activation button so it "thought" it was locked in a shift
event. We subsequently added a
momentary "shift"button and a ground wire for the shift button and were
able
to program and see our gear cut programming. The simulator would
then only sense a gear change when we pressed the button.
Interuptions, breaks in the process, and life in general, all intrude to screw up your Dataset and make it easy to both overlook and forget entries.
When you finish
your CalTool
3.6 entries and tuning you're going to end up with two
files:
(1) A CalTool
Dataset : That has all the data
enries.
(2) A CalTool Workspace: What the computer screen looks like.
Break Down and Document the Important Categories
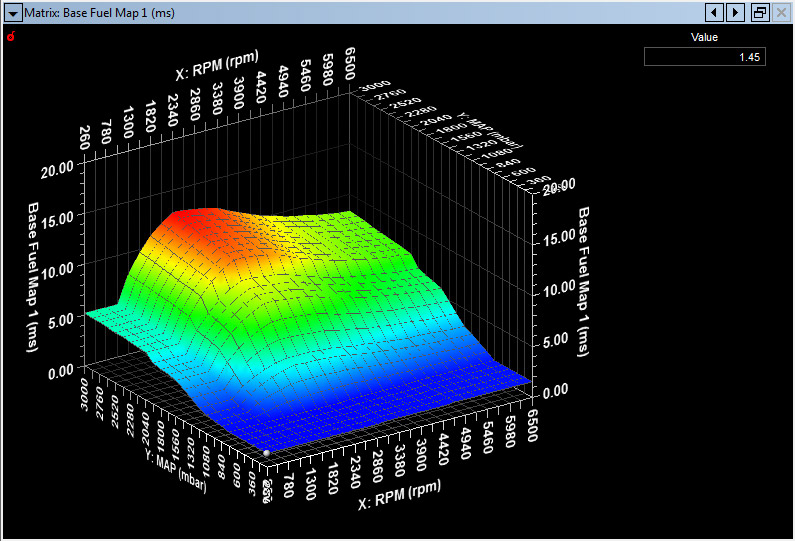
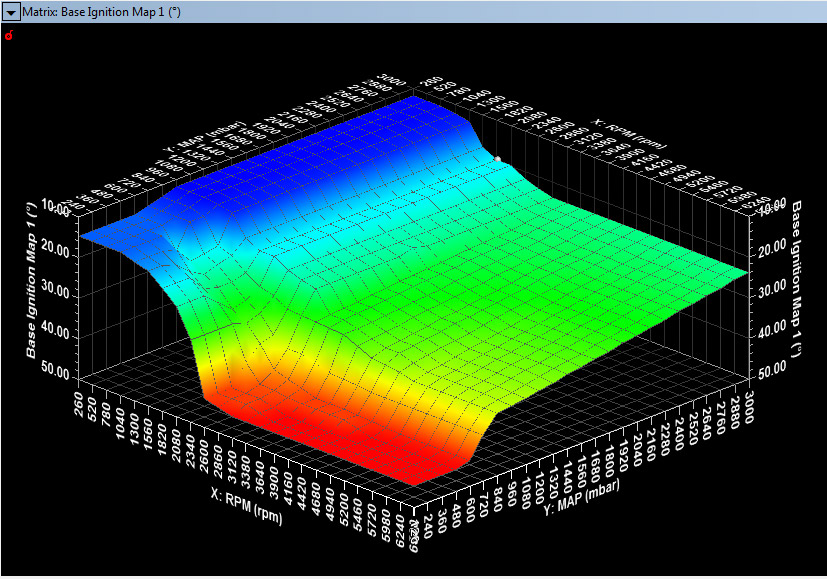
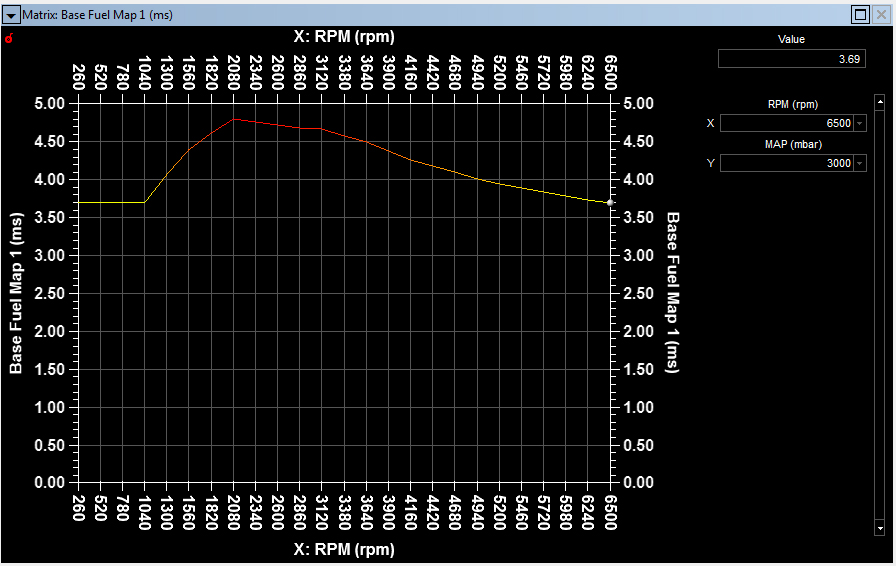
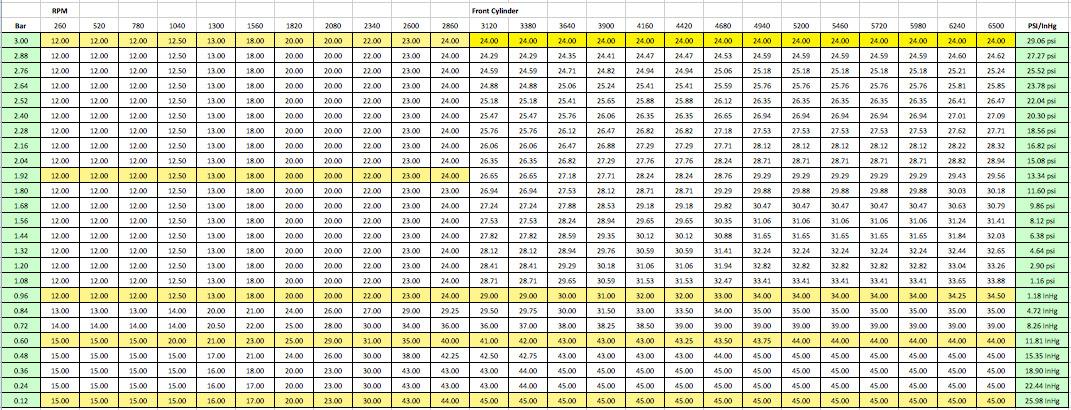
Fuel Maps in CalTool 3.6 can have up to 50 RPM sites and 25 Load Sites. In the picture above we have set up a 25 x 25 fuel map for 3 Bar and 6500 RPM operation. A unique feature of CalTool 3.6 is that the RPM axis does not have to be equally spaced i.e. if you need increased resolution in a certain rpm range you can do so. There are four (4) base calibrations in the SQ6M engine controller. The user can switch these "on the fly" with a Cal-Pot rotary switch.
You can edit in either the
3D "Matrix Surface Editor" shown above or on in a 2D "Matrix Editor"
table format shown below.
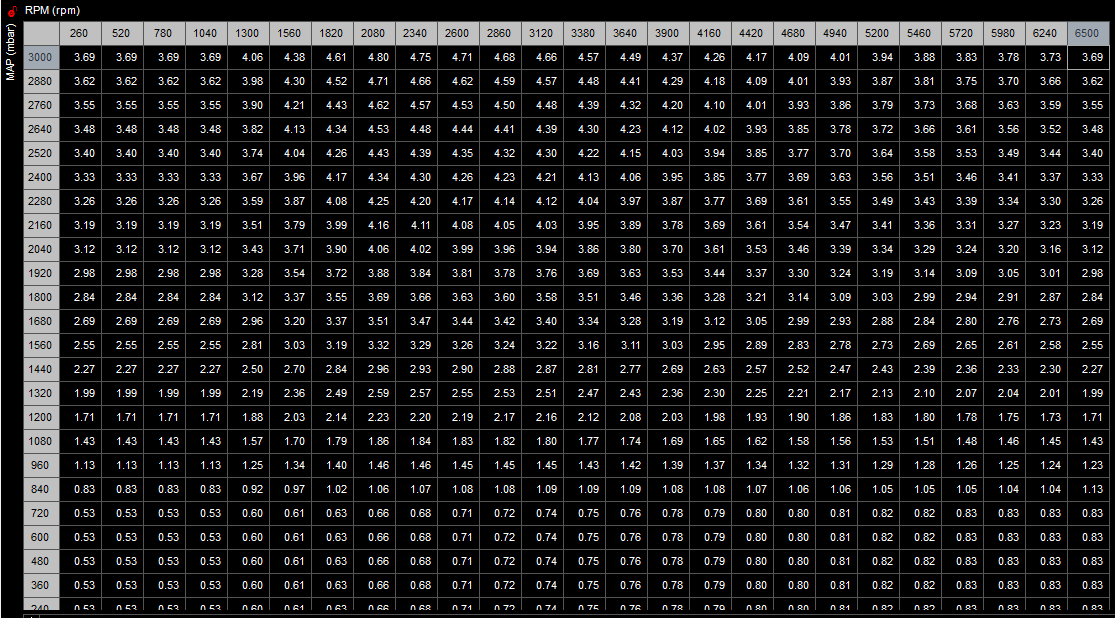
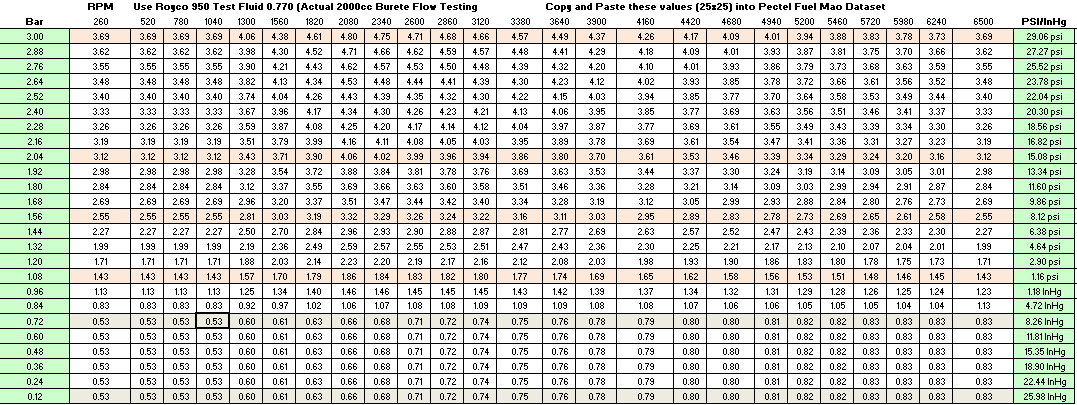
Editing is done in a number of ways, either by direct one cell edit, by the entire map, or selected areas. Math functions are available for editing. Basic resolution is .01 millisecond or .00001 seconds. Any finer gradation than this is meaningless. We generate our four base maps in Excel using predictive equations to save time...If you have four spark maps and four fuel maps and they are maxed out at 50 RPM x 25 Load sites that is up to 40,000 digits and 10,000 decimal points you get to manually enter. We automate the process and use copy and paste from Excel to CalTool 3.6.
In either format you use the arrow keys to navigate about the map. In the 3D format you use the CTRL Key and the arrow keys to rotate or flip the map.
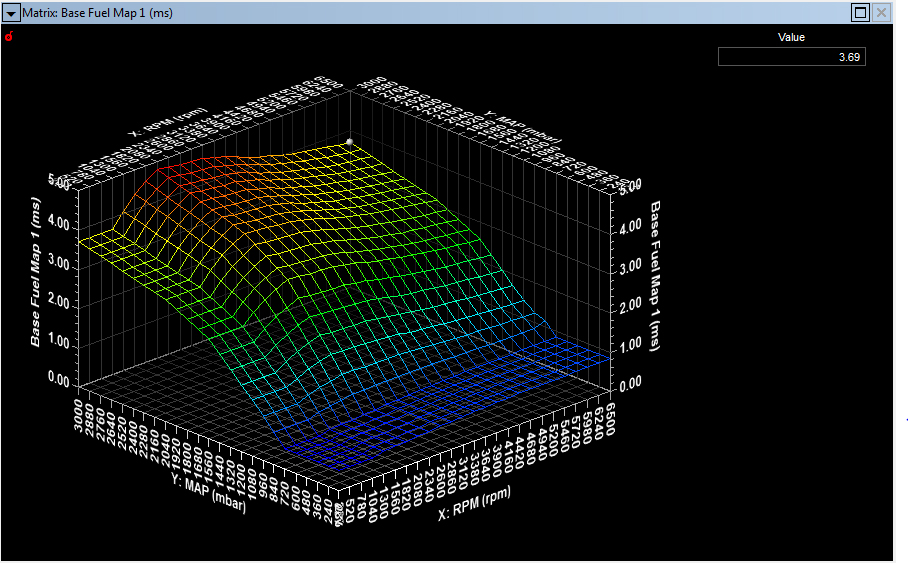
When in the Matrix Surface Editor mode (top image) if you "right click" your map, a dialog box will pop up and in "View" you have a number of ways to view your fuel map data. Pictured above is a Wireframe view.
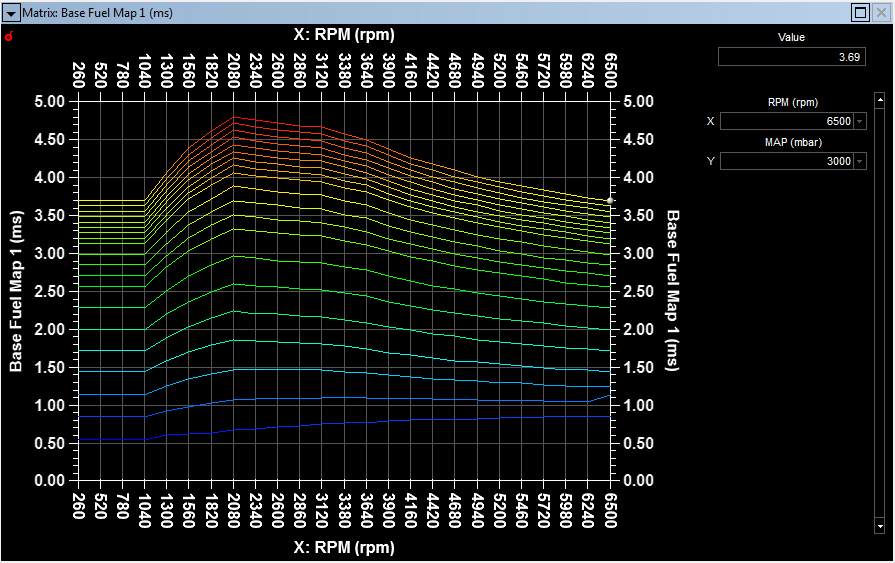
Above is the X Axis Slice. This is very useful, especially in Turbo maps to look for mistakes in manual editing.
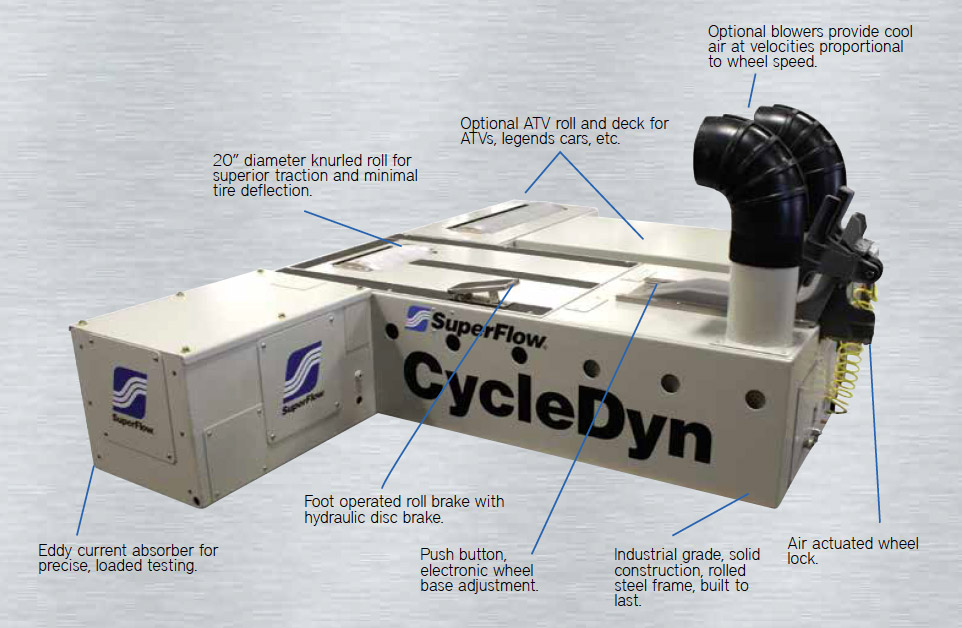
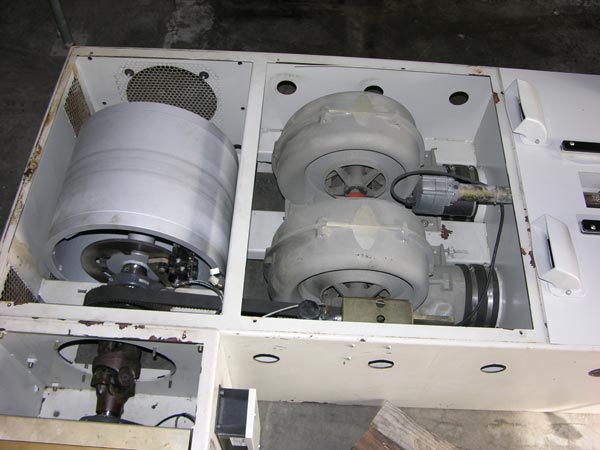
These optional
$5,900.00 internal "High Pressure Blowers" provide cool airflow to
match road speed 1:1 up to 200 mph. The CycleDyn is calibrated at
Superflow at the time of manufacture to measure and account for this
additional drag.
Fuel Map Editing in
CalTool 3.6
The dyno tuning
process is
simple with the SQ6M: You first must turn Closed Loop Lambda off.
1. Set up a Trace
Window
with the following, selected from Exploring Channels / Matching
Channels
LAM1
LAM2
Inj_m_Lambda
Inj_m_Lambda2
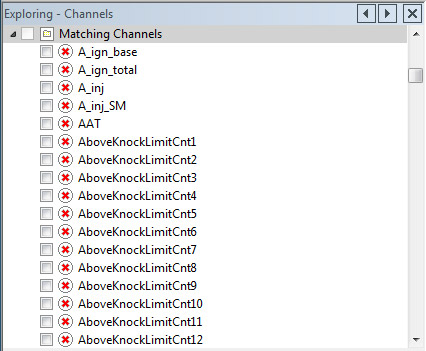
Scroll down the list to:

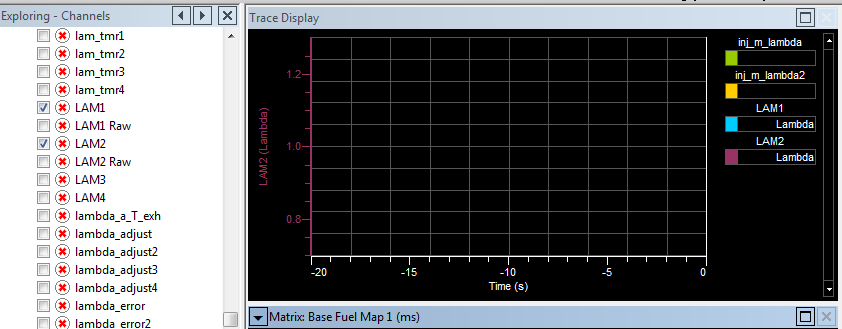
The entries will show
up in
the trace window and will be scrolling during the dyno run.
2. Do a Dyno pull and then press the "Pause" icon at the top of the screen.
3. Move the cursor over the traces and go to the corresponding points on the fuel map where the cursor is in the center of a cell.
4. Multiply the cell
value
by the Inj_m_lambda
value. For example if the cursor is in the
middle of the 4680 RPM and the 0.96 Bar cell, Inj_m_lambda reads 0.92,
i.e. richer than the target, then multiply the cell value by
0.92.
5. If lnj_m_lambda values
are leaner than or equal to the target i.e. greater than or equal to
1.0 then you might want to add a bit more fuel than the multiplier.
Separate banks or cylinders need to be even, otherwise you may want to
use individual trims to even things out. Monitor LAM1 and LAM2.